|
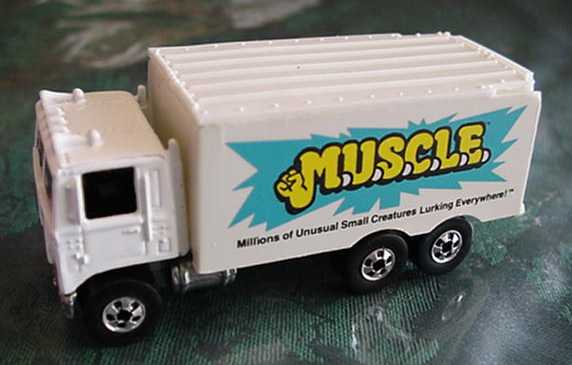
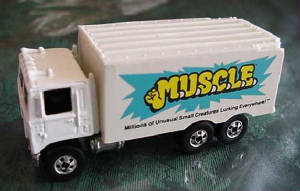
This is a picture of an authentic M.U.S.C.L.E
HiWay Hauler. Because this is a prototype there are only approximately 5 of these trucks know to exist. This is perhaps the
most valuable piece of M.U.S.C.L.E memorabilia. It is valued at over $1000. Even if you had an extra couple of thousand dollars
the supply of M.U.S.C.L.E Haulers is too small. The only way to own a M.U.S.C.L.E Hauler, is to build a M.U.S.C.L.E Hauler.
While I’m not an expert customizer I think my guide should help you “acquire” your own M.U.S.C.L.E Hauler.
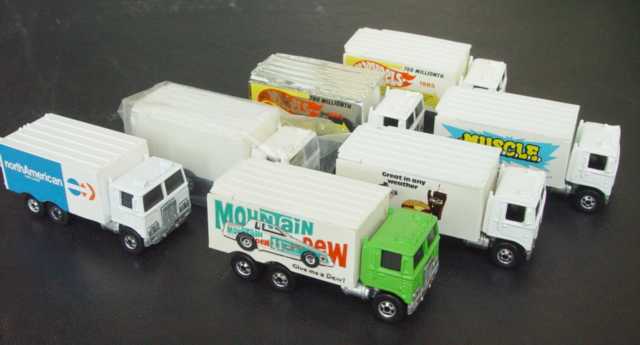
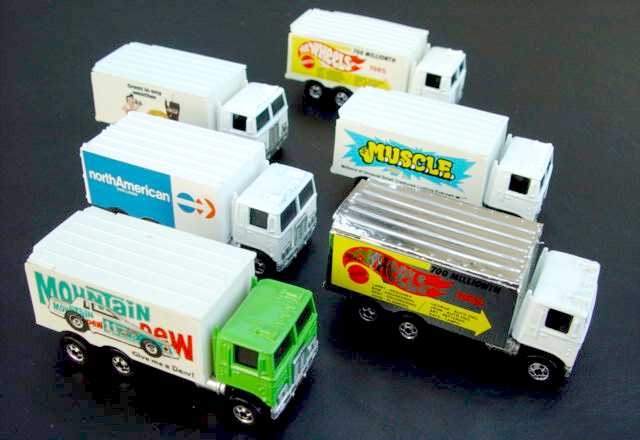
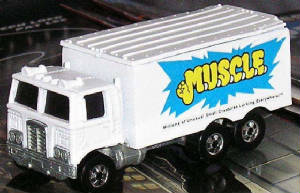
The two above pictures are from a thread in the
Mattel Hot Wheels Discussion Forum. They show the M.U.S.C.L.E Hauler in the midst of other HiWay Haulers, many of which are
also quite valuable. But let’s get started.
STEP-BY-STEP Guide
for
Building a Custom M.U.S.C.L.E HiWay Hauler
There are lots of ways to customize
Hot Wheels cars and trucks. This is the method I used. It was simple enough that I was able to make my first customized toy.
If you are an expert customizer, then you may have different methods but feel free to use this as a guide.
Step 1 – Find Your Truck
There are two starting
points when you want to make a M.U.S.C.L.E. HiWay Hauler.
The first point is
that you just grab a truck. If you do this, then skip to Step 2.
If you want your M.U.S.C.L.E.
HiWay Hauler to be as perfect as possible, then you are going to take a different path. You will need then to get a HiWay
Hauler from the right time period. It will also help if you work with a white truck. It would be possible to use another color,
but using a white truck will hide more of your mistakes.
There are only a few
trucks that met those criteria. And to save you some time, here are the four trucks:
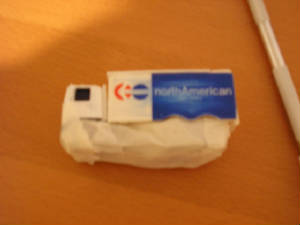
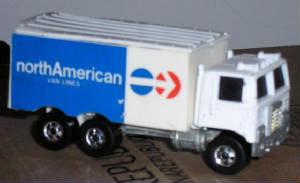
1985 Hot Wheels
· HiWay
Hauler: North American Van Lines (Toy #1174, HWC #5420)
o This would be my suggestion for the truck to use (See Figure A Below). It seems to pop up on eBay
fairly often, and tends to be the most affordable of the 4 trucks. I tried to get this truck from Hot Wheels collectors, but
they tended to want about twice what it was going for on eBay. All of the collectors I dealt with stuck with Tomart’s
price guide as a Bible. It was my experience that the car cost between $10~$15. This, like all toy prices, could change.
· HiWay
Hauler: Hot Wheels Racing Team (Toy #9549, HWC #2612)
o I haven’t seen many of these on eBay. So I’m unable to say much about the price.
1986 Hot Wheels
· HiWay
Hauler: Masters of the Universe – Toy Delivery (Toy #2548, HWC #2613)
o I wasn’t able to find these cheap. These seem to be popular with Hot Wheels and He-Man collectors, which is bad
news for MUSCLE collectors. However, many of these trucks were still on their cards. Perhaps this would be easier to get loose?
1988 Hot Wheels
· HiWay
Hauler: NASA (Toy #5144, HWC #2615)
o I saw this truck sporadically on eBay, and Hot Wheels collectors seemed to have them. But again these tended to be
more expensive than the North American Van Lines truck. This would be a good choice if you can get a good deal.
|
|
|
Step 2 – Clean Your Truck
Ok, now you’ve
got your HiWay Hauler. Let’s get ready to destroy any of its monetary value.
Make sure the truck
is as clean as possible. I would not suggest just dropping it in some soapy water, but make sure it as clean as possible.
Use your own discretion here. I simply used a Clorox handi-wipe and took off some surface dirt and grim.
Step 3 – Sand Your Truck
You are going to want
to lightly sand your truck. This will help remove any extra debris, and help your primer to stick. But be VERY careful. The
tops of these trucks are very soft. If your sand paper is too coarse and/or you press too hard, then you could easily start
to sand away details.
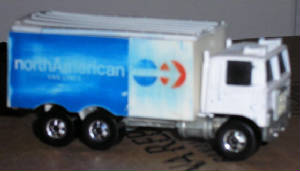
I really concentrated
on removing some of the paint from the sides of the trucks (See Figure B Below). Again I didn’t go
overboard. I noticed that with the North American Van Lines truck the paint almost seemed to smear. This is normal. Remember
you’re just trying to remove some of the paint, and to help your primer stick. Don’t go crazy with the sandpaper!
I purchased my sand
paper from a hobby shop. Ask the clerk for the finest sand paper they have, and they should be able to help you. Tell him
you are customizing a Hot Wheels car, and they should know what you need. At least my hobby shop did.
|
|
|
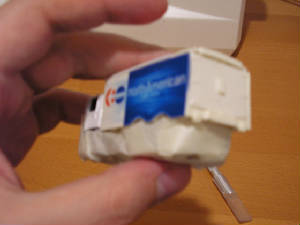
Step 4 – Tape the Bottom of the Truck
This will take a little
time so be patient. This step is crucial, because this will protect the pieces of the truck that you don’t want to paint
(i.e., the chrome, wheels, windows, etc.).
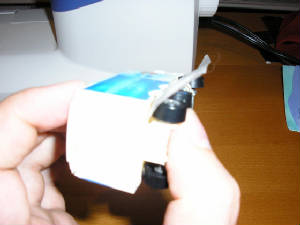
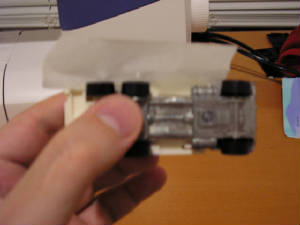
I found that it is
best to start with the base of the truck, specifically the wheels. What is nice about HiWay Haulers is that the back of the
truck overhangs the wheels. This allows you to slide the tape under it (See Figures C, D, E, F Below).
Then lightly push the
tape down, and continue around the base of the truck. This should protect the bottom of the truck. I used a few layers of
tape so that nothing would seep through the paint, and that cracks in the pieces of tape were covered with other pieces of
tape.
Step 5 – Tape the Grill and Windows
For me, this was the
most difficult step. Placing the tape over the grill and windows was easy (See Figure G Below), but the challenge
is to use a straight edge razor to remove the excess tape.
You want the tape to
remain on the grill and windows. And I’ve found it’s better to leave a little too much tape, instead of not enough
(See Figure H Below). But don’t worry if it’s not 100% perfect. By using the straight edge
you can easily remove any of the extra paint.
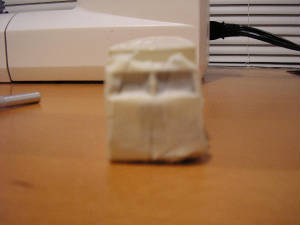
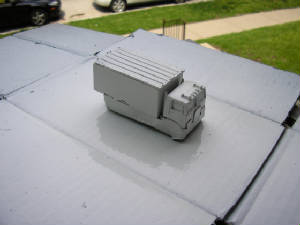
Step 6 – Prime the Truck
I used Testors Spray
Enamel (1237 Flat Gray Primer) to prime the truck. If you prefer a different product, then defiantly use it. This is simply
the product I used.
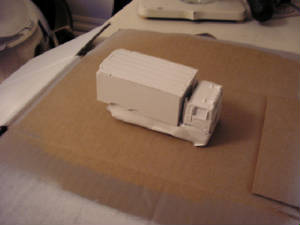
I should note that
I put two coats of primer on the truck. If you spray correctly, then you will probably need to put on a second coat too (See
Figure I Below).
Step 7 – Paint the Truck
I used Testors
Spray Enamel (1245 Gloss White) to paint the truck. If you prefer a different product, then defiantly use it. Again,
this is simply the product I used.
I should note that
I put two coats of paint on the truck. If you have sprayed correctly, then you will need to put on a second coat too (See
Figure J Below).
|
|
|
Step 8 – The M.U.S.C.L.E Graphics
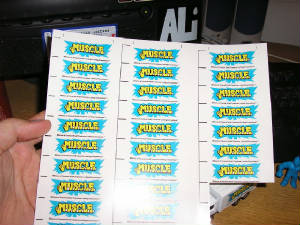
Thanks to the creator
of Nathan's M.U.S.C.L.E Page I was able to get an excellent replica graphic. The challenging part of this step is actually
printing the sticker.
I think it is better
to use a sticker sheet that doesn’t have any shine. When you look at the original graphic it doesn’t look very
shiny. That is why you should try to use a sticker sheet that doesn’t have a glossy finish.
The first time I tried
to print this logo I wasn’t able to find a printer that could print the blue light enough. I hope you have a fantastic
printer and this isn’t a problem for you.
The only way I was
able to fix the problem was by going to a local print shop. I suggest going to a local shop instead of a chain. They will
be much more willing to help, and probably won’t charge you as much as a chain. No matter what, make sure you ask about
costs up front. I was quite pleased with how the sticker sheet turned out (See Figure K Below).
Once you have the stickers
it is up to you how you want to place it on to the truck. I prefer to use the straight edge and cut away as much of the excess
sticker as possible.
After you have your
sticker ready use the original picture as your guide and stick that baby on your truck. Don’t forget the other side!
|
|
|
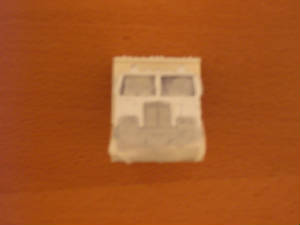
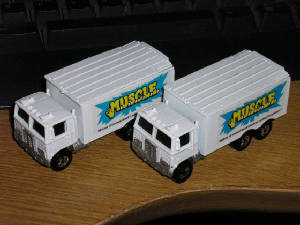
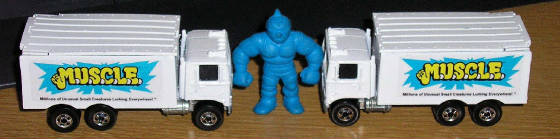
Step 9 – The Final
Product
Congratulations! You’ve saved over a 1000 dollars and you’ve
got a M.U.S.C.L.E. HiWay Hauler that is just as good. Figure L (See Below) shows two of the HiWay Haulers
that I made and Figure M (See Below) shows a comparison between the actual Hauler and the custom Hauler.
| |
|
|
|
Figure M
|
|
|
|